Setting up the Wishlist app
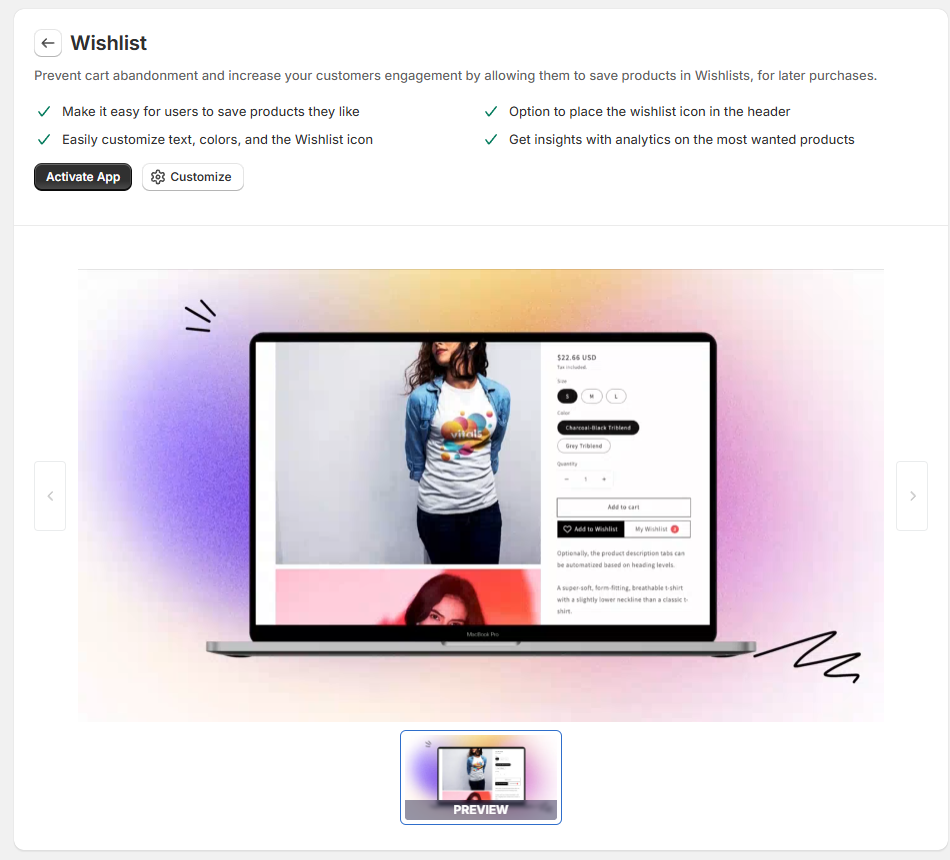
The Wishlist app by Vitals allows customers to save products they love and purchase them later. Wishlists help shoppers keep track of items they are interested in and give you valuable insights into which products are most popular among your visitors.
Wishlist features can increase engagement, encourage repeat visits, and improve your store’s conversion rate.

Why Use a Wishlist on Your Shopify Store?
Customers often want to save products for later for many reasons:
- A product or size may be out of stock
- They want to purchase later
- They are comparing products
- They are planning gifts or special occasions
For merchants, wishlists provide valuable data about customer preferences, which can help you optimize marketing campaigns, product inventory, and promotions.
How the Wishlist Works for Your Customers
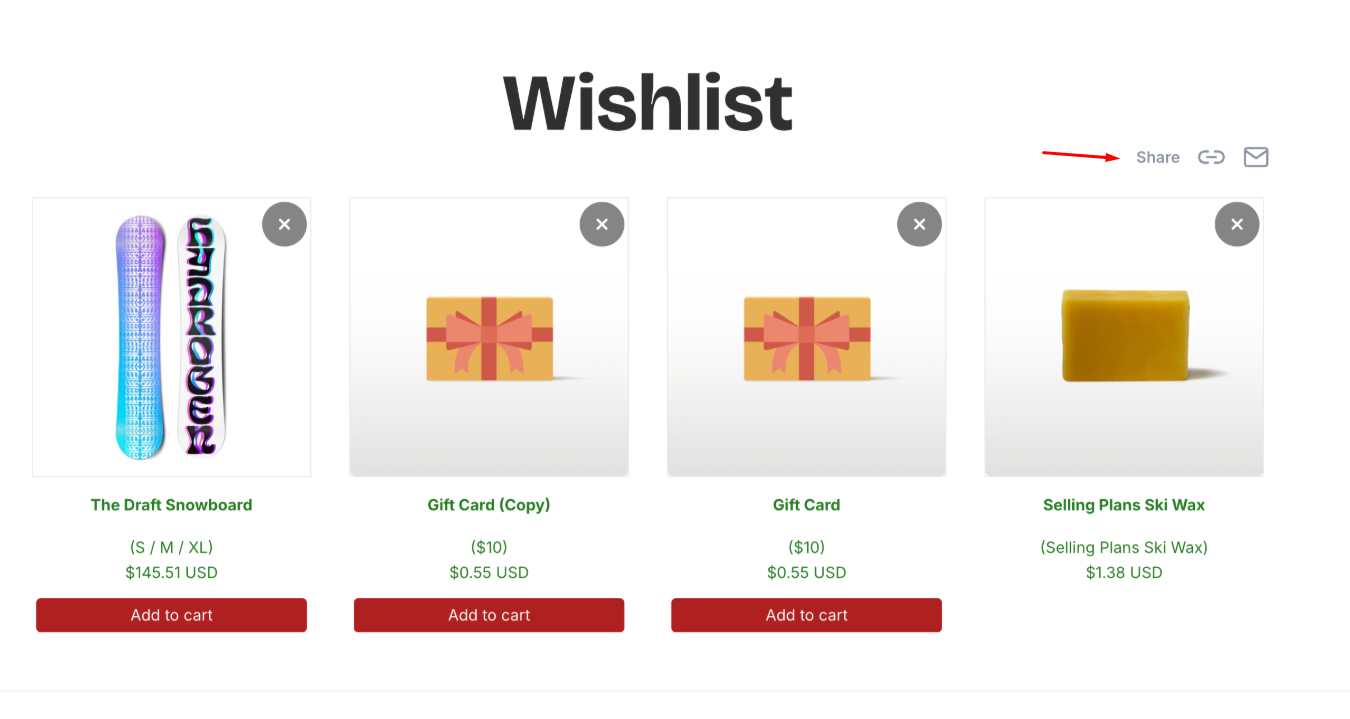
Customers can save products to their wishlist by clicking the Add to Wishlist button on the product page. Depending on your settings, shoppers may see an Add to Wishlist button, a heart icon on the main product image, or both.
Once added, the product is saved on a dedicated wishlist page.

The wishlist is stored indefinitely and backed up using cookies, so customers can easily return and access their saved items later.
From the wishlist page, customers can:
- Add products directly to the cart
- Remove products from the wishlist
- Share their wishlist with others
- View stock alerts for items running low
Key Wishlist Features
Add All to Cart Button
Customers can now add all products from their wishlist to the cart with a single click.
Instead of adding products individually, the Add All to Cart button allows customers to quickly purchase multiple wishlist items at once.
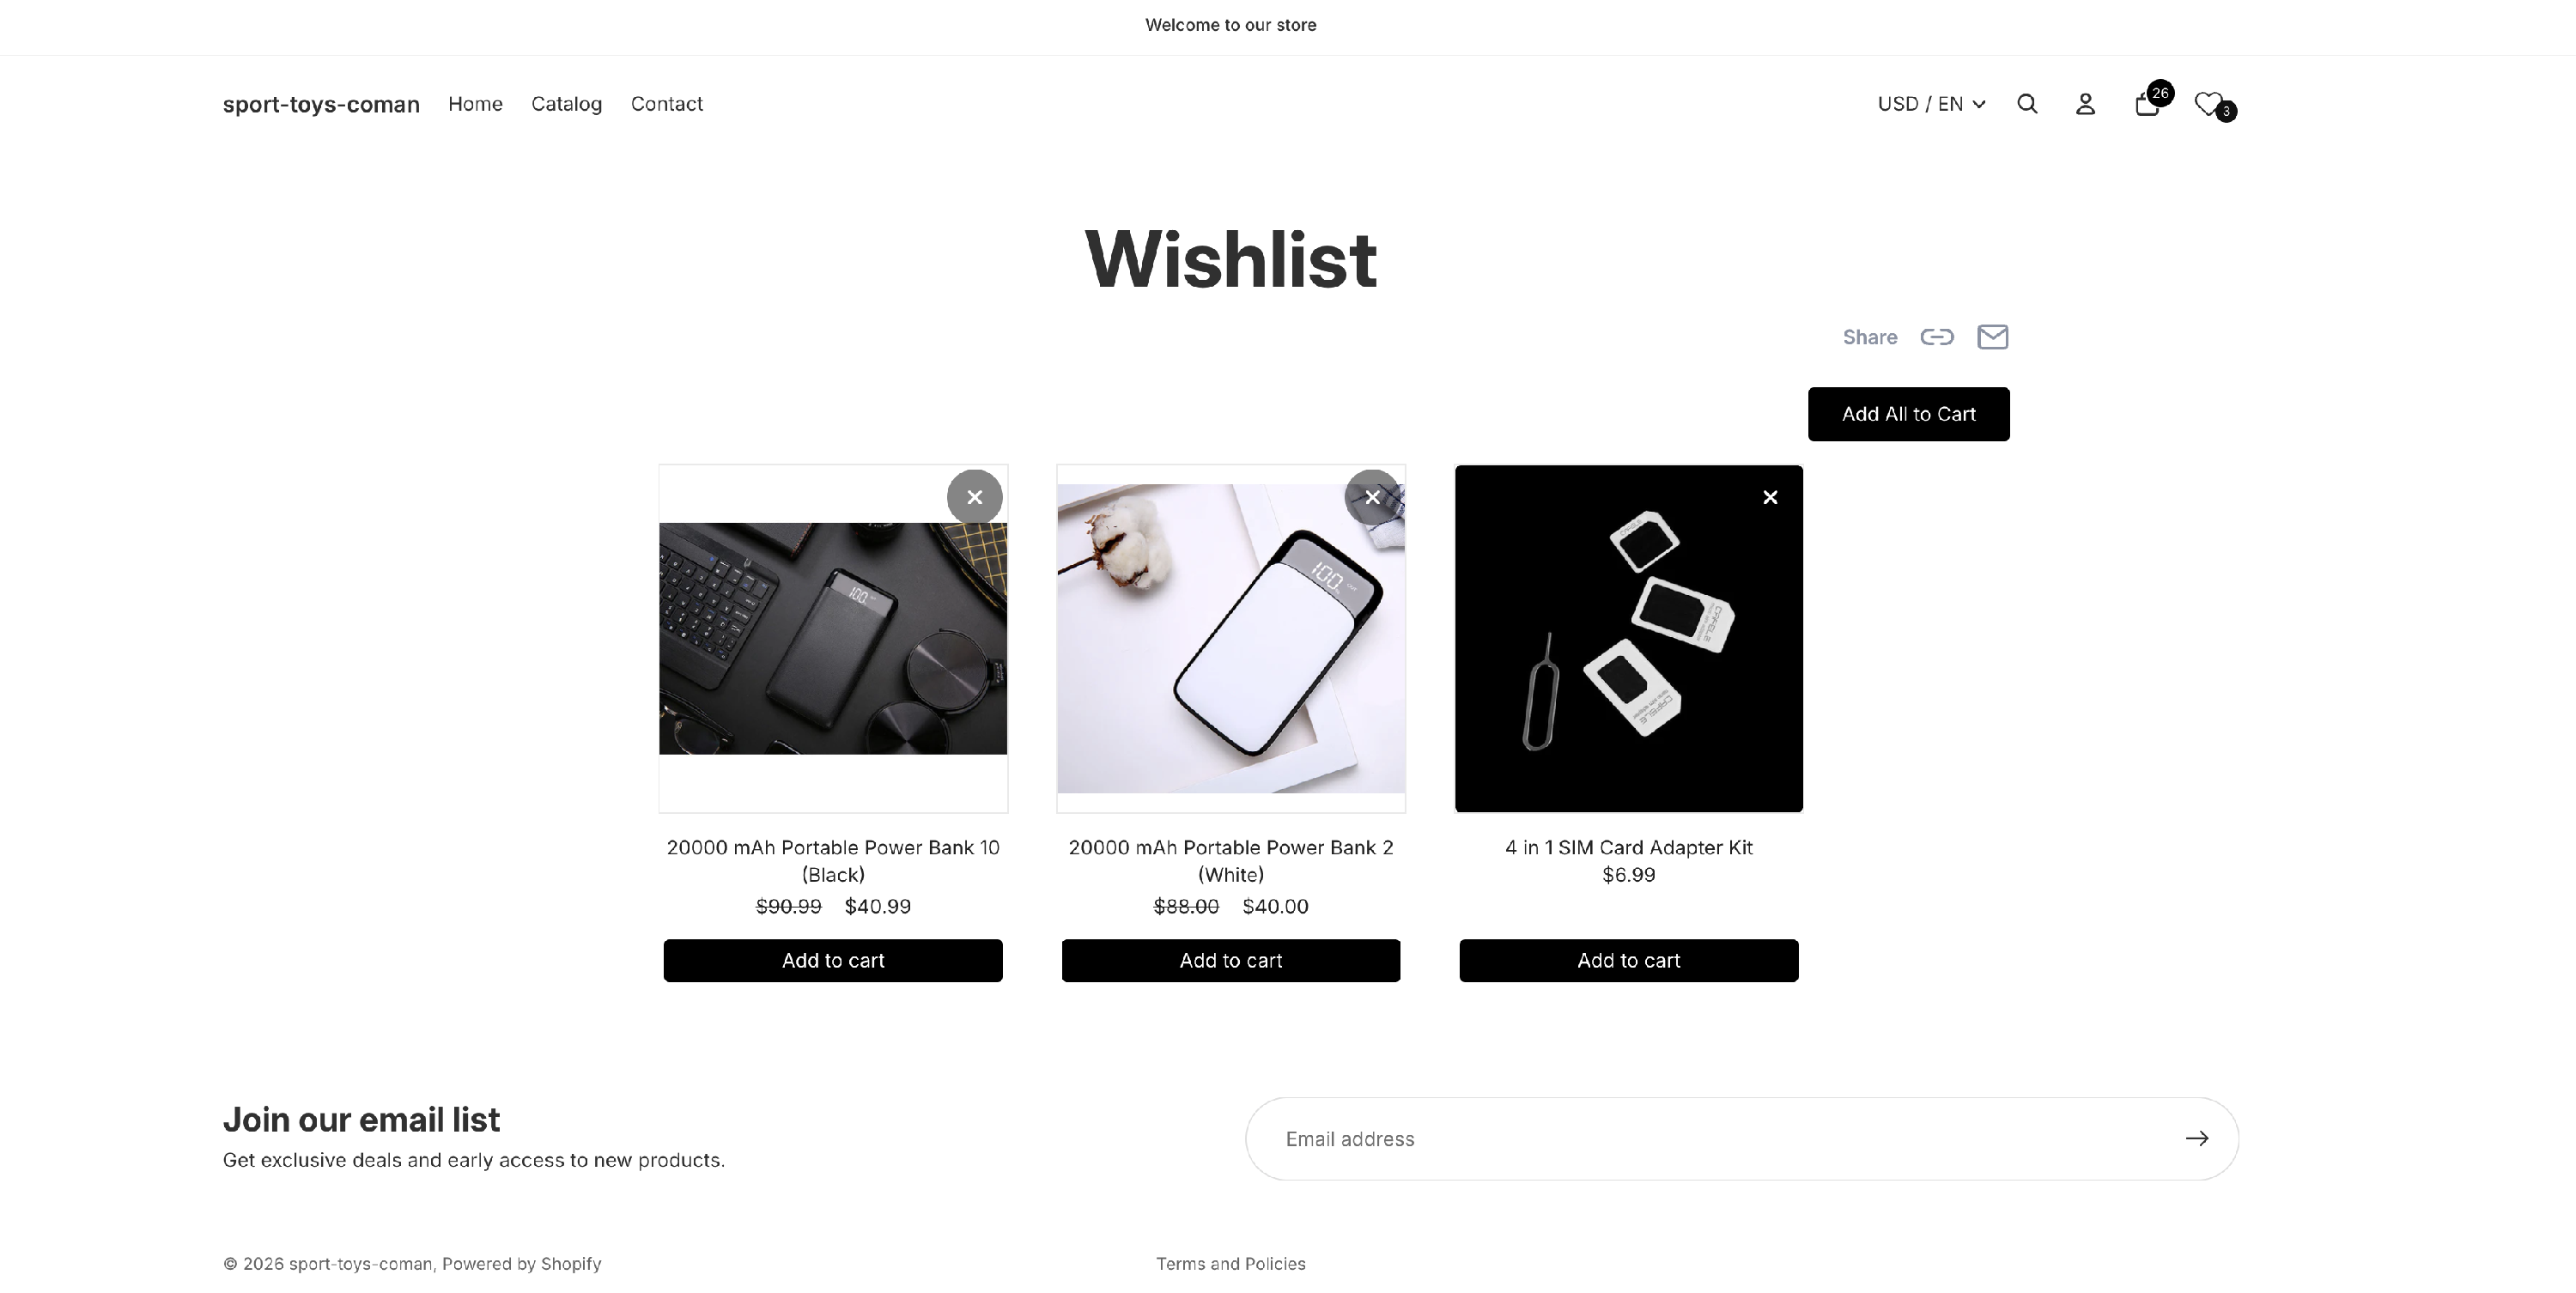
Highlights:
- Appears automatically when enough items exist in the wishlist
- Helps increase checkout conversions
- Button text is fully translatable, supporting multilingual stores
Low Stock Urgency Indicator
When a product saved in the wishlist is running low on inventory, customers will see a visual low-stock warning.

This creates urgency and encourages customers to purchase before the product sells out.
Customization options:
-
Set the stock threshold (e.g., show warning when fewer than 5 units remain)
Customize the text color
Works on:
- Personal wishlists
- Shared wishlist pages
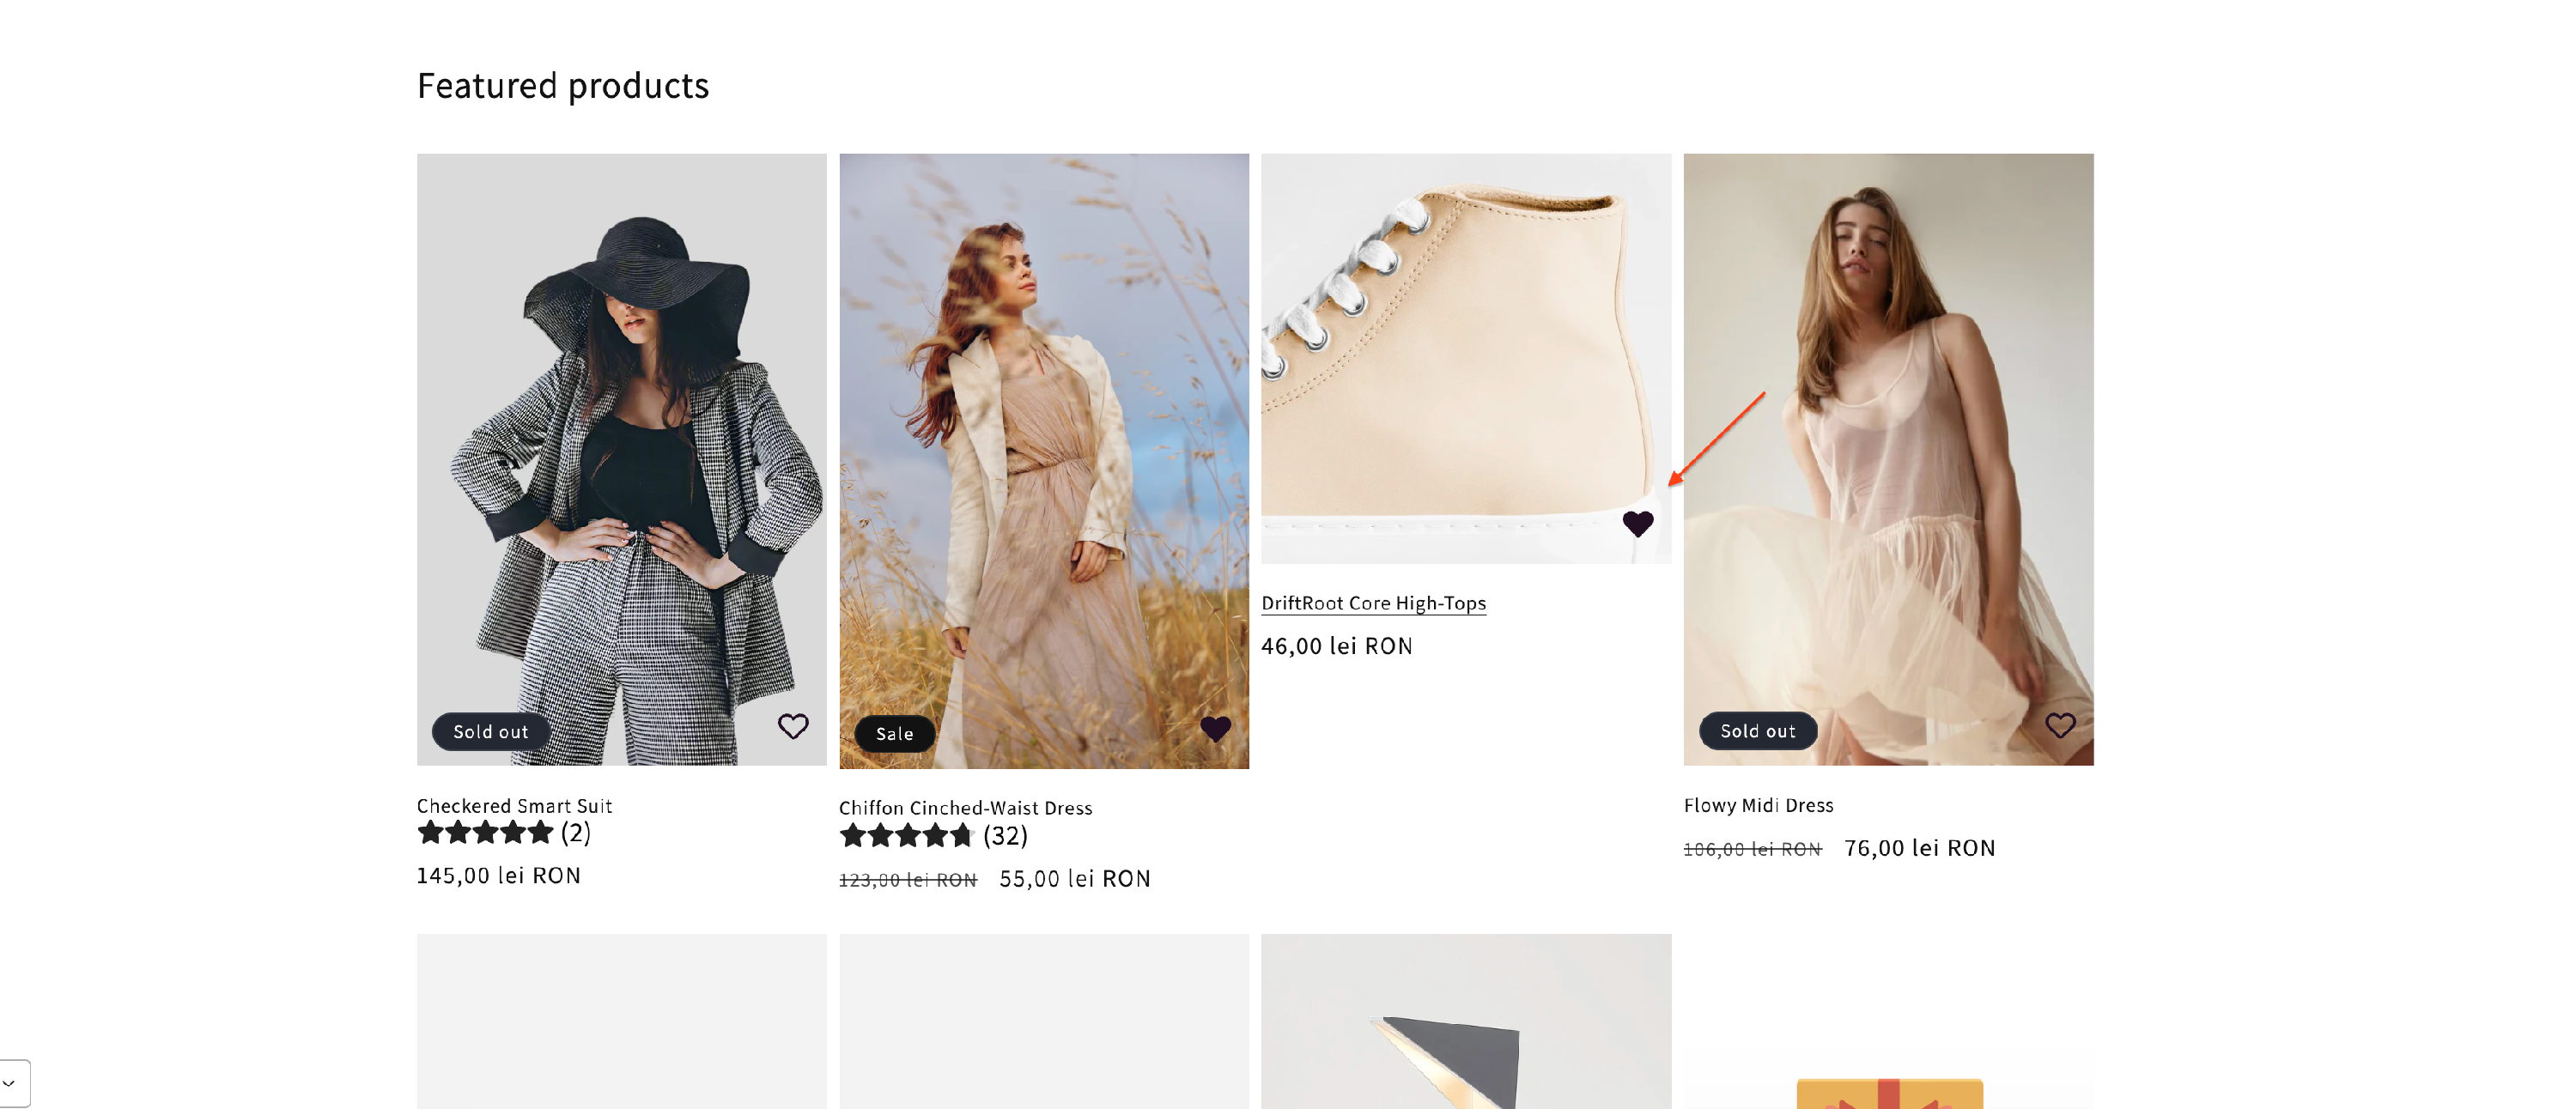
Wishlist Heart Icon in More Places
The wishlist heart icon is now displayed in more areas of your store, allowing customers to save products more easily.
Customers can now add items to their wishlist from:
- Product pages
-
Vitals Related Products app and Recently Viewed apps
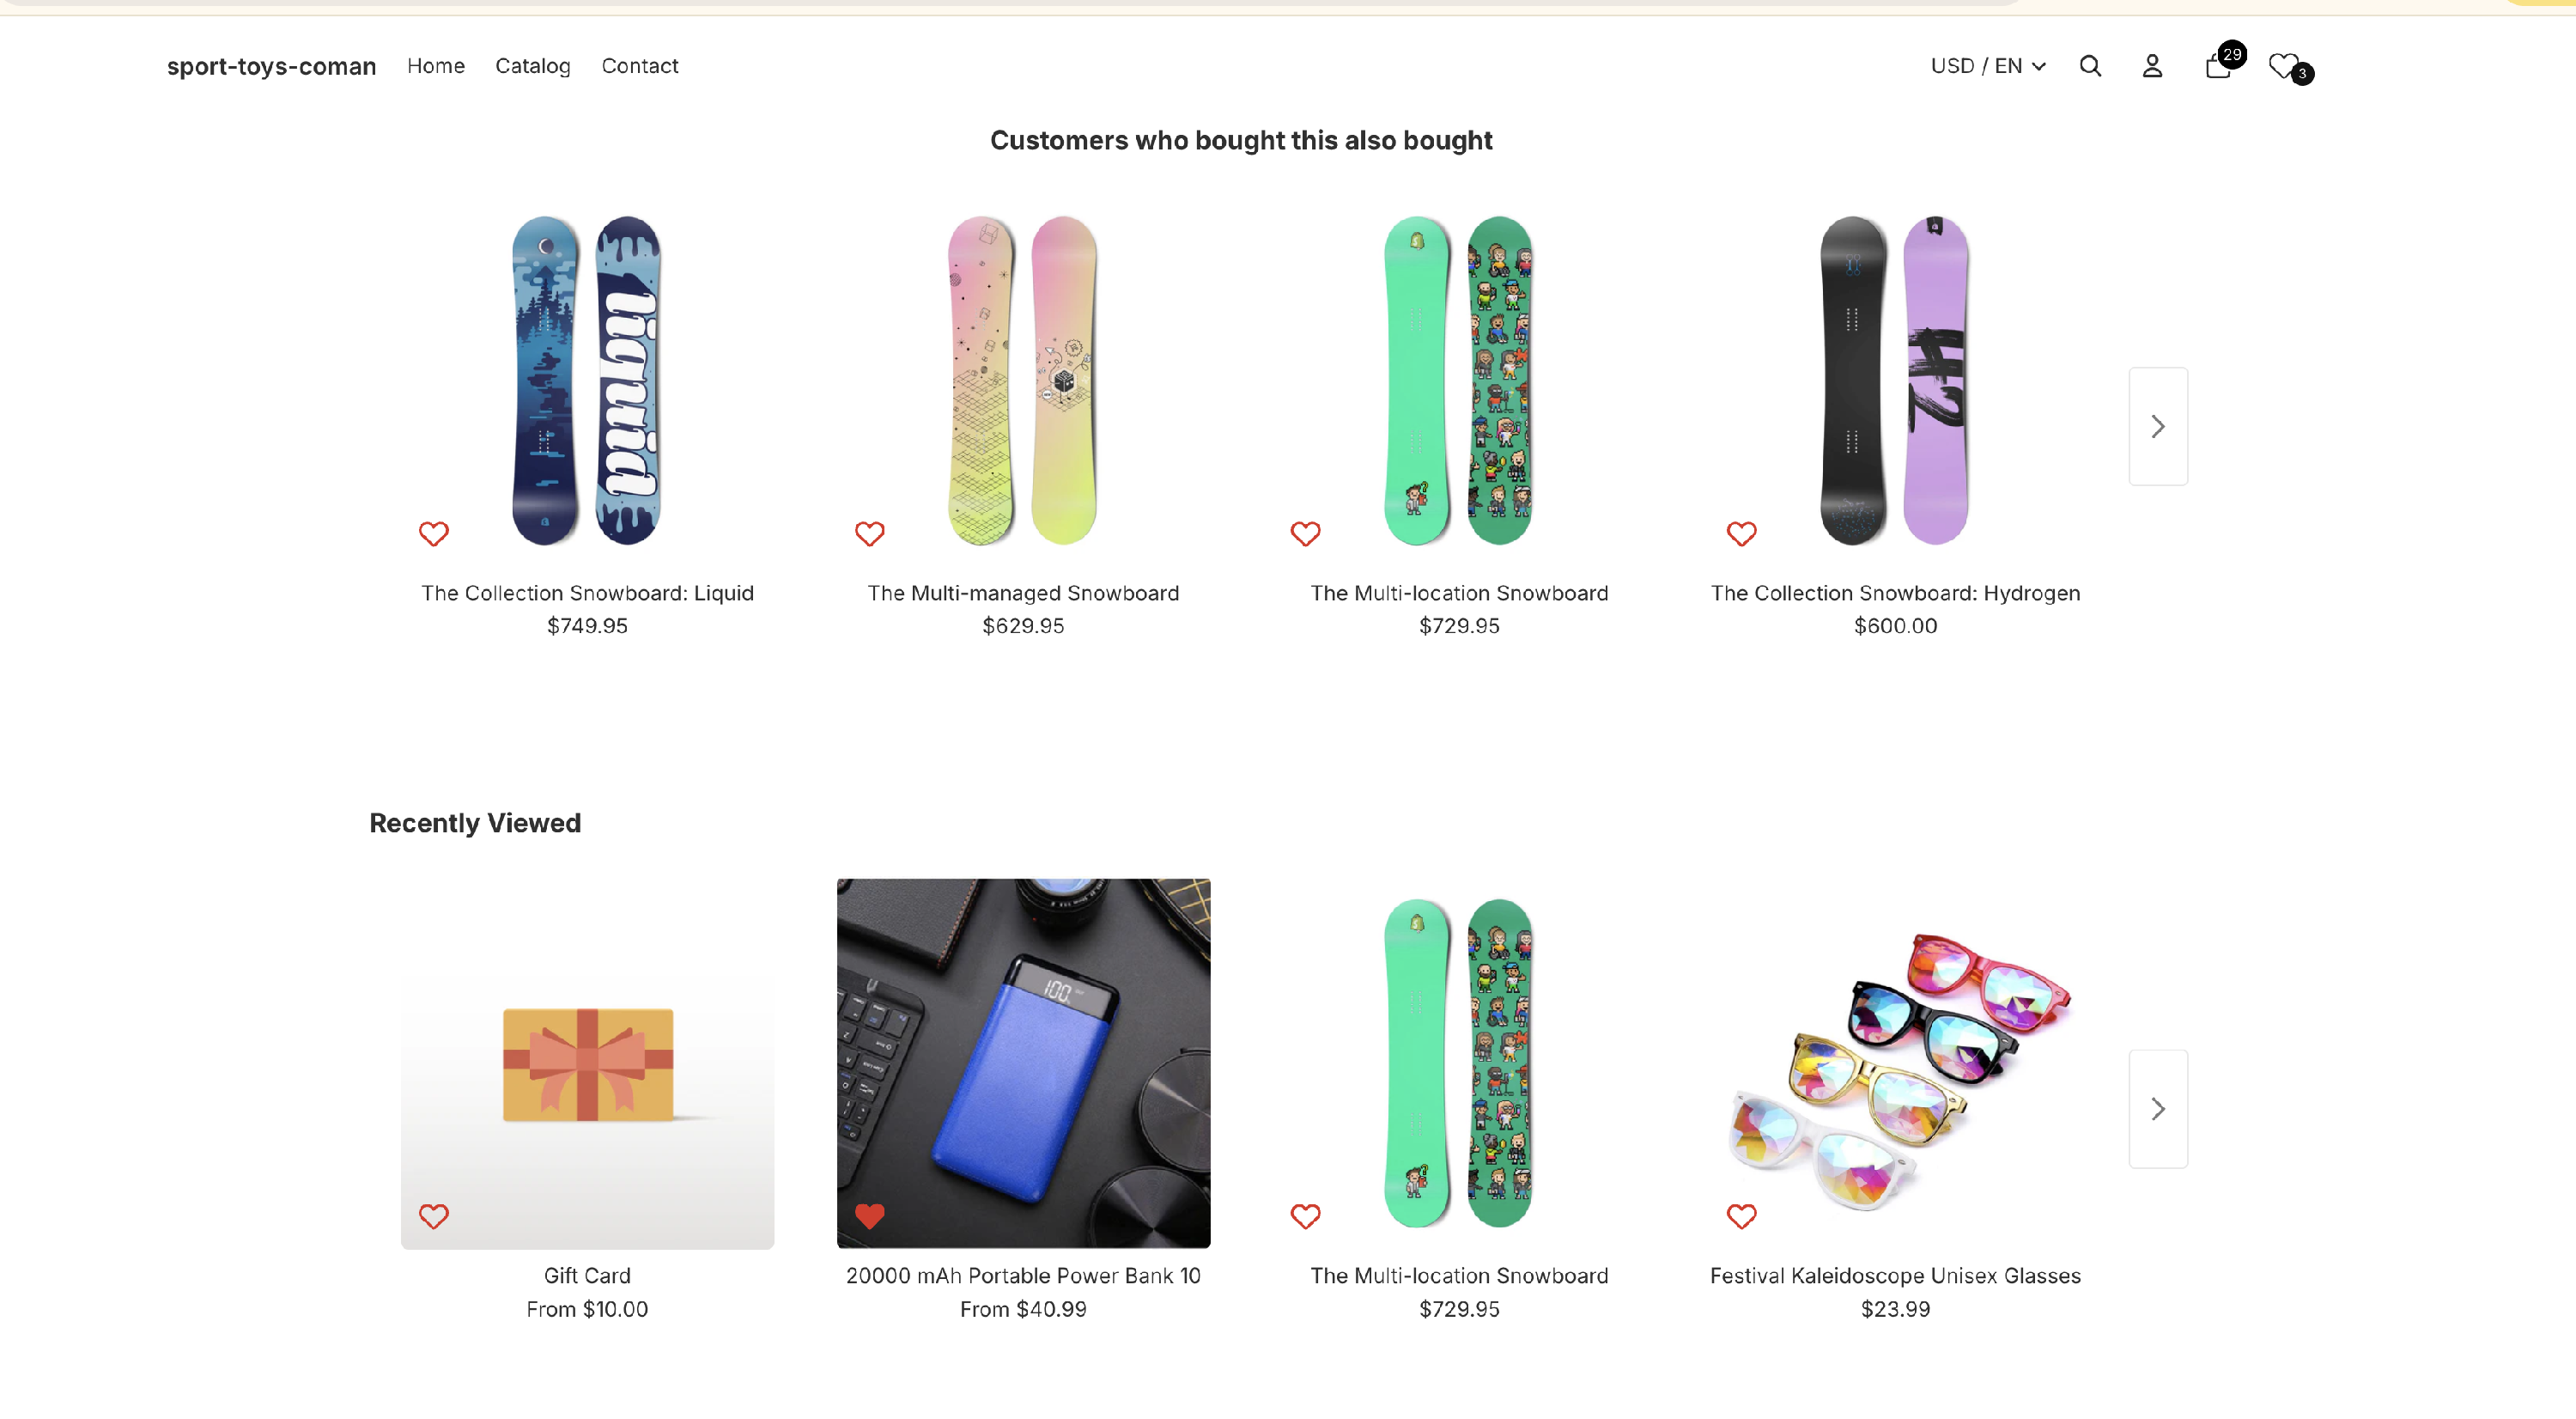
-
Home and collection page product cards


This expanded placement ensures customers can save products wherever they discover them.
The feature also works on themes with custom product card layouts that previously did not support the wishlist icon.
Shared Wishlist Improvements
Customers can now share their wishlist with friends and family.
Wishlist sharing is perfect for:
- Gift lists
- Special occasions
- Product recommendations
Improvements include:
- Dedicated wishlist icon button
- Sharing via link or email
- Improved product title styling
- A more polished shared wishlist page
How to Set Up the Wishlist App
Setting up the Wishlist app takes only a few steps.
Step 1 — Enable the App
Simply enable the Wishlist app inside Vitals.
The feature works out of the box, and no additional setup is required.
Step 2 — Configure the Wishlist Settings
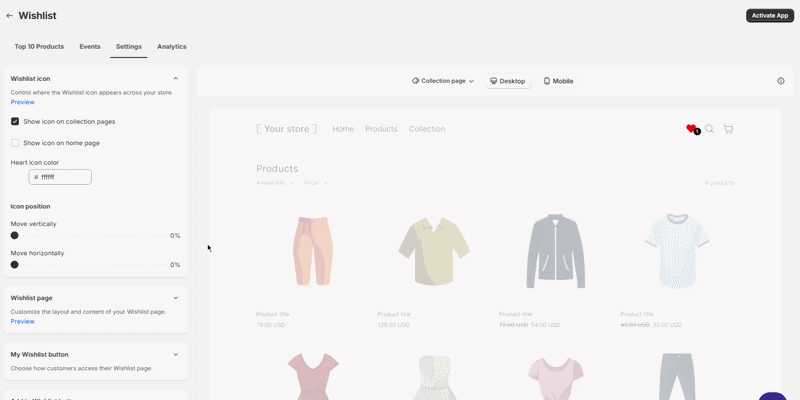
You can customize several aspects of the Wishlist:
- Show the wishlist heart icon on the main product image
- Hide the Add to Wishlist button on the product page
- Show or hide the wishlist heart icon
- Adjust the low stock indicator threshold
- Customize translations and button text
- Choose the placement of the Wishlist icon
- Modify the appearance of wishlist elements
Wishlist Analytics
Vitals provides analytics to help you understand customer behavior.
Analytics Cards
The Analytics section shows quick stats about Wishlist activity for the past 30 days:
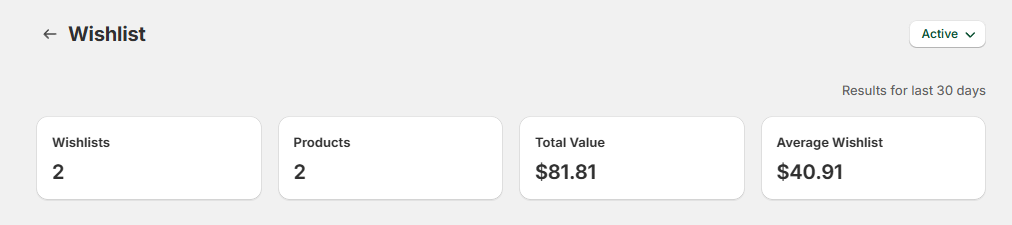
- Wishlists – Total number of wishlists created
- Products – Number of unique products added to wishlists
- Total Value – Combined value of all products currently saved
- Average Wishlist – Average number of products saved per visitor
Top 10 Products
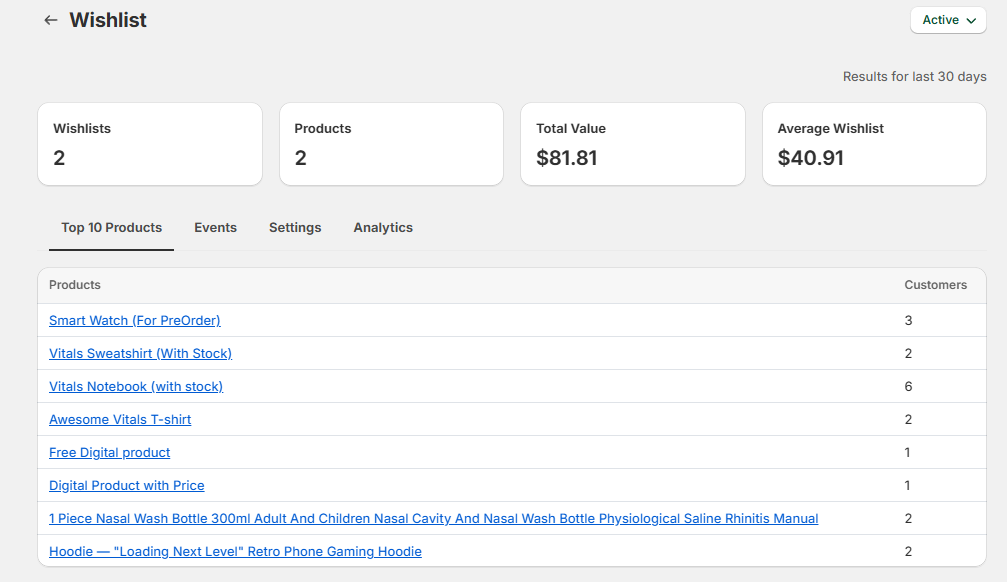
This tab shows the 10 most wishlisted products, sorted by popularity.
Product variants are grouped together, meaning only the main product is counted.
Events Tab
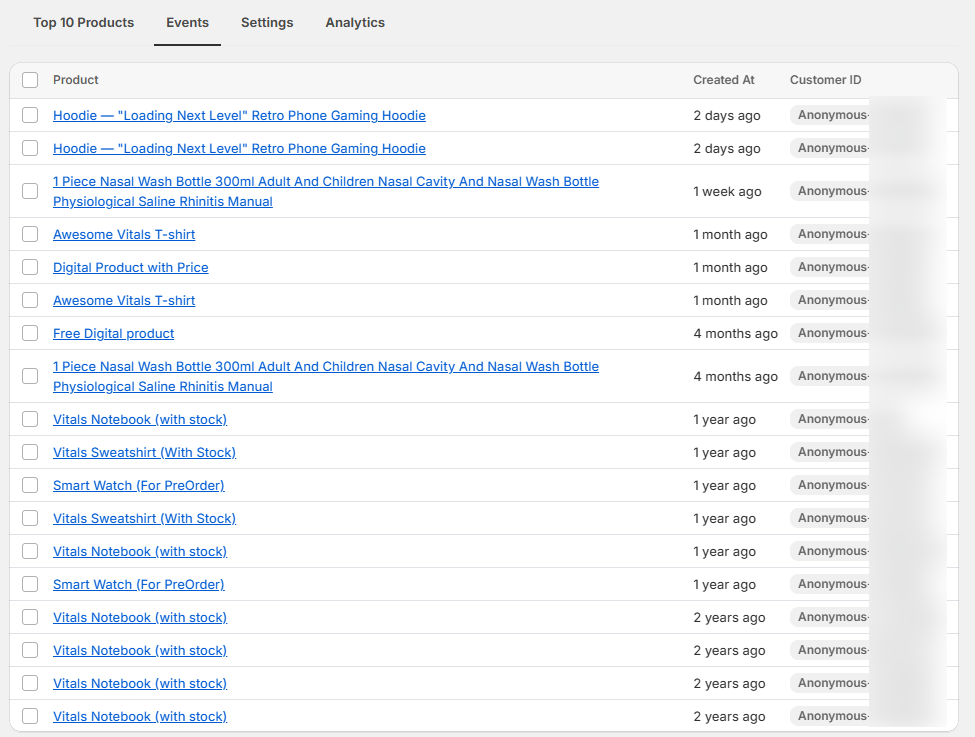
The Events tab shows real-time wishlist activity, including:
- Recently added wishlist items
- Anonymous visitor activity
-
Customer accounts (if logged in)
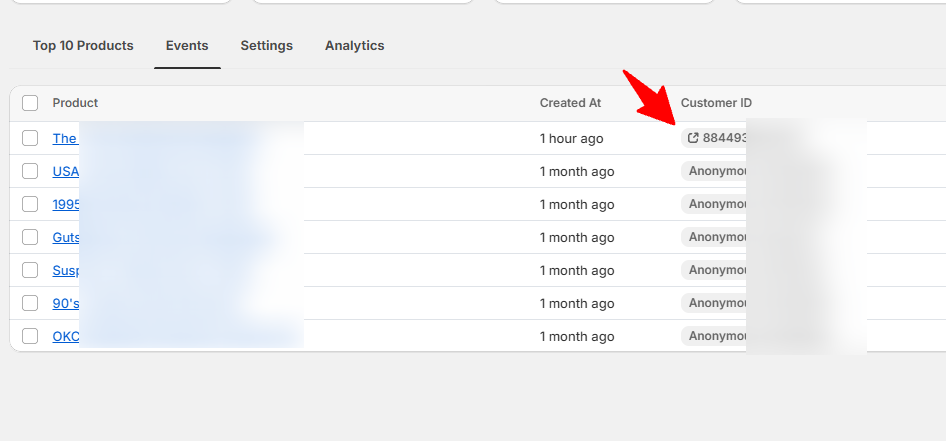
Visitors without accounts are tracked using unique Anonymous IDs.
Note: If a visitor not signed in adds products to the wishlist but then logs in to his user account in the store in the same session, the products he added to the Wishlist will be transferred to his user profile/customer ID.
Frequently Asked Questions
Can I import wishlist data from another app?
Currently, importing wishlist data from other apps is not supported, but the feature is being considered for future updates.
The wishlist icon should appear in the header but it doesn’t show. Why?
If the icon does not appear in the header after selecting the option, your theme may use a custom navigation structure.
Contact our support team and we will help you place the icon correctly.
Can products stay in the wishlist after adding them to the cart?
Currently, adding a product to the cart removes it from the wishlist automatically.
We are exploring options to allow products to remain in wishlists based on user feedback.
Does the Wishlist sync across devices?
Yes, but only when customers are logged in. If your store has customer accounts enabled and the shopper is signed in, their Wishlist is tied to their account and will follow them to any device they log in from.
If your store doesn't use accounts, or the customer adds items without signing in, the Wishlist is saved only to that device's session. Opening the store on a different device will start a fresh session, and the previously saved items won't appear.
Why can’t I see the “Add to Wishlist” button on the product page?
Check whether the Hide "Add to Wishlist" button setting is enabled in the Wishlist app settings. When this option is turned on, the button is removed from the product page.
If the Display heart icon on main product image setting is enabled, customers can still add products to their wishlist using the heart icon shown on the main product image.
❓ App not appearing on your store? The Vitals app might not yet be enabled on your Shopify Theme via the App Embeds section. For more information, you may go here: Enabling the Vitals app via App Embed
Final Thoughts
The Vitals Wishlist app makes it easy for customers to save products they love, share them with others, and purchase them when they’re ready. With features like Add All to Cart, low-stock alerts, expanded wishlist icons, and wishlist sharing, you can create a smoother shopping experience and encourage more conversions.