Creating BOGO or Buy X Get Y offers
Last updated on September 17, 2026
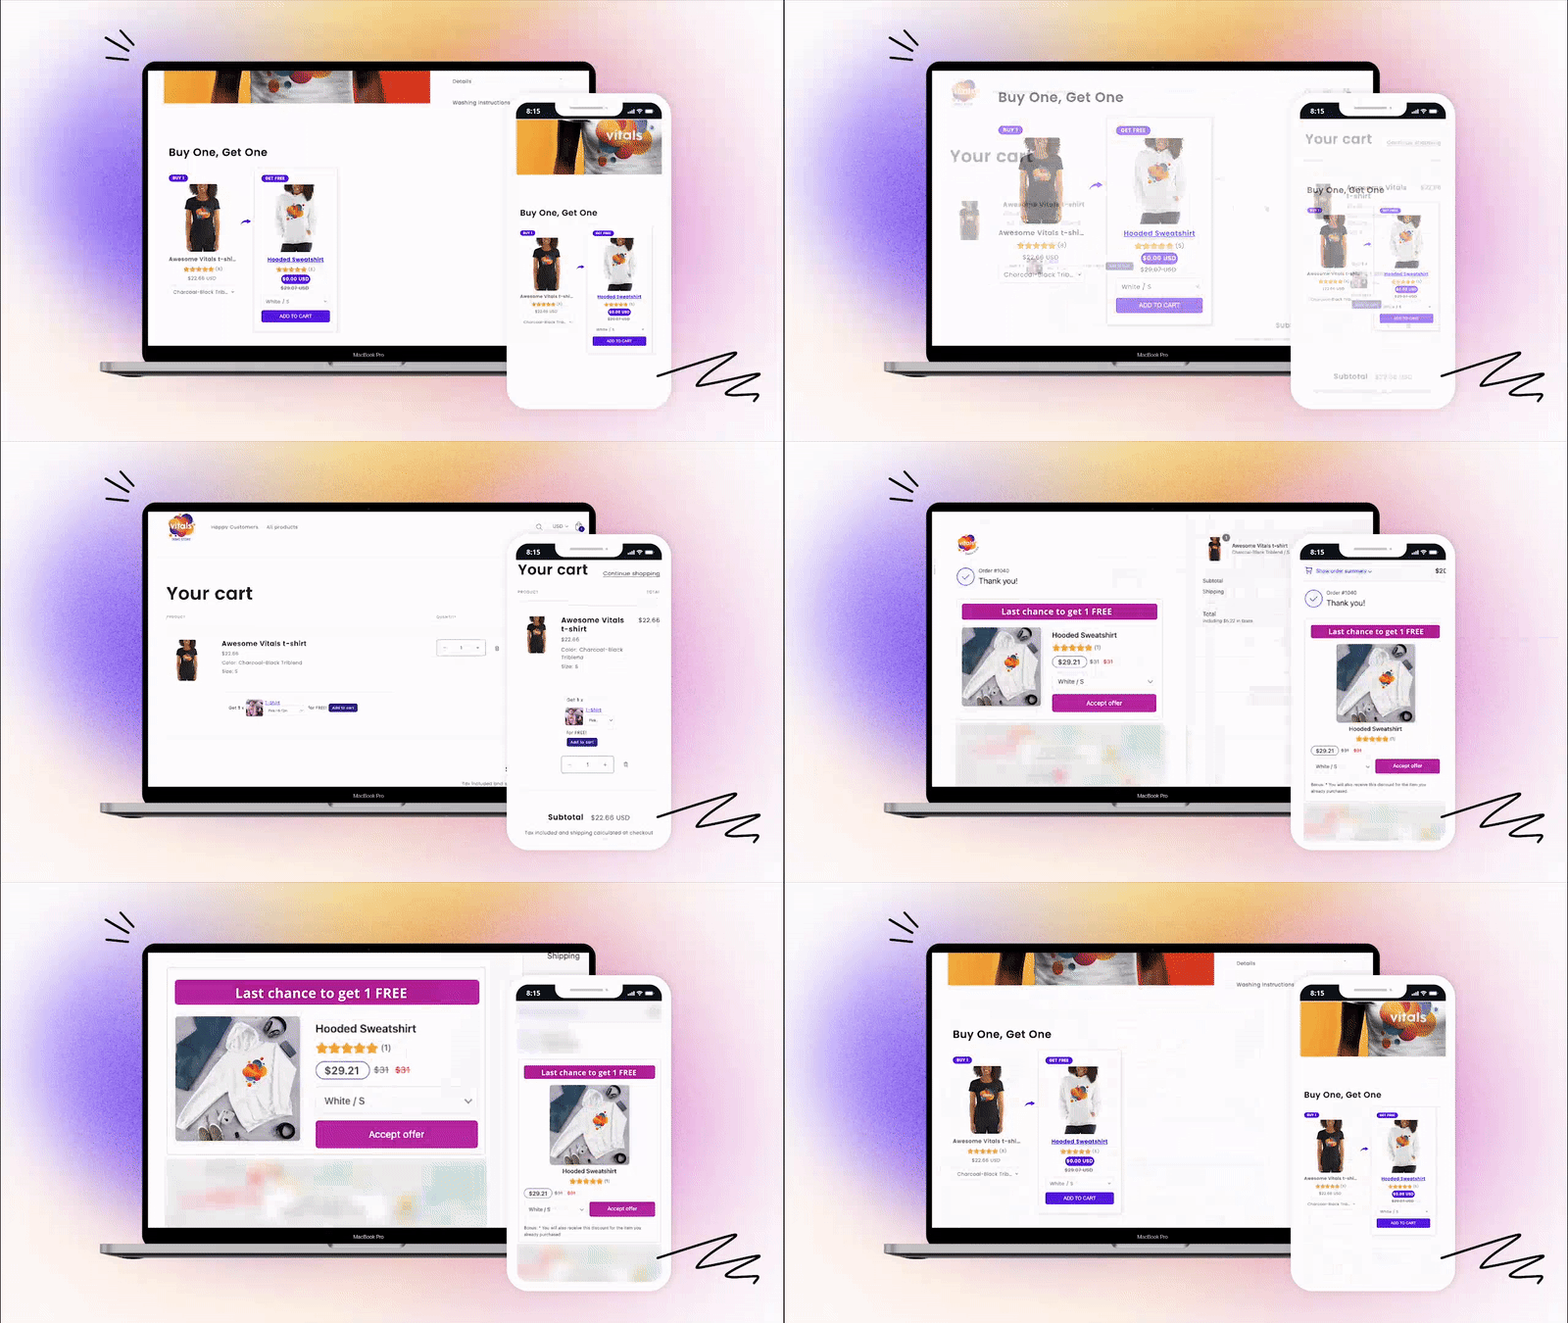
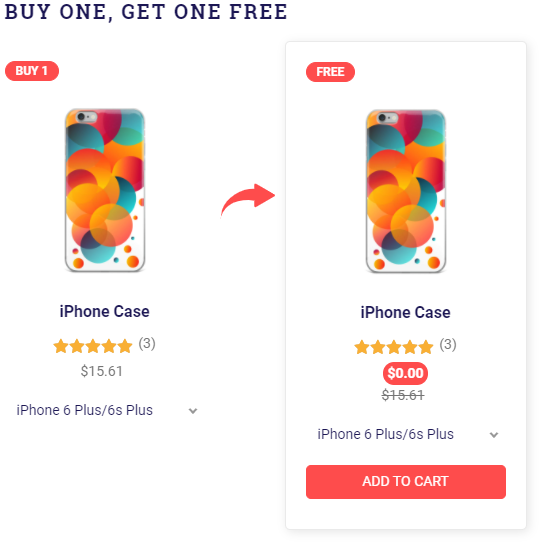
Buy-one-get-one, two-for-one, double-value are just a few nicknames of the famous Buy X Get Y discount type. BOGO has one of the longest histories, with roots tracing back over one century ago in the United States newspapers. It's so famous and effective that it was generally criticized for creating food waste and obesity on a national level.
💡 Got a question about our Upsell Offers? We have a list of frequently asked questions about our Upsell Offers that you can check here: Upsell Builder FAQs
Getting Started ⚡
Buy X Get Y joined the elite of flagship apps of the Vitals suite, with a charming design and highly customizable appearance. Buy X Get Y is the third, but certainly not the last 🙃 app of its kind, inside the Upsell Builder module, opening up a wide range of possibilities to move inventory, make a profit, and satisfy customers. A created Buy X Get Y offer is going to be displayed on Product pages.
💡 Vitals discounts can be applied from any Upsell Builder apps, such as Buy X Get Y, Product Bundles, and Volume Discounts. If multiple offers target the same products when added to the cart, then the higher discount based on the actual price from all the offers will be applied. Learn more.
To create a Buy X Get Y offer, open Vitals from your Shopify admin, go to Upsell Builder and click Create offer. On the Choose your offer type page, find Buy one, get many (BXGY) and click Choose on one of its two layouts:
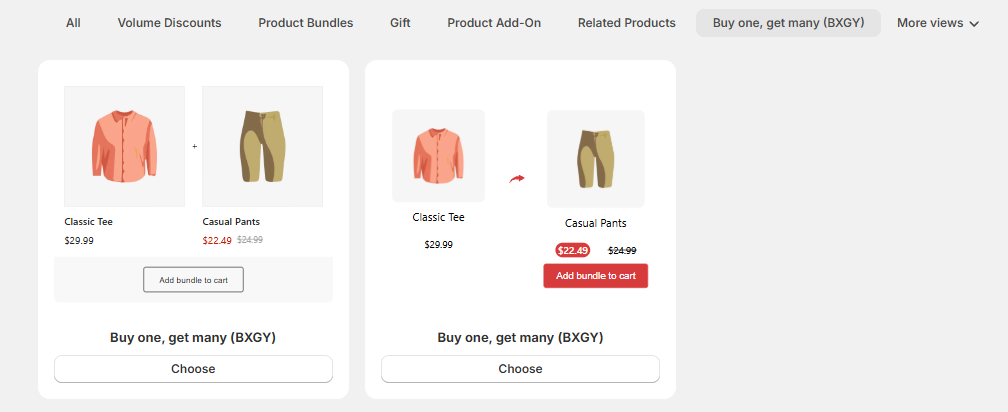
- Products set - the offer's button sits centered below the products.
- "Y" in foreground - the offer's button sits to the right.
You can switch layouts later. In the product page appearance editor, the same choice appears under Layout as Modern (Products set) and Classic ("Y" in foreground).
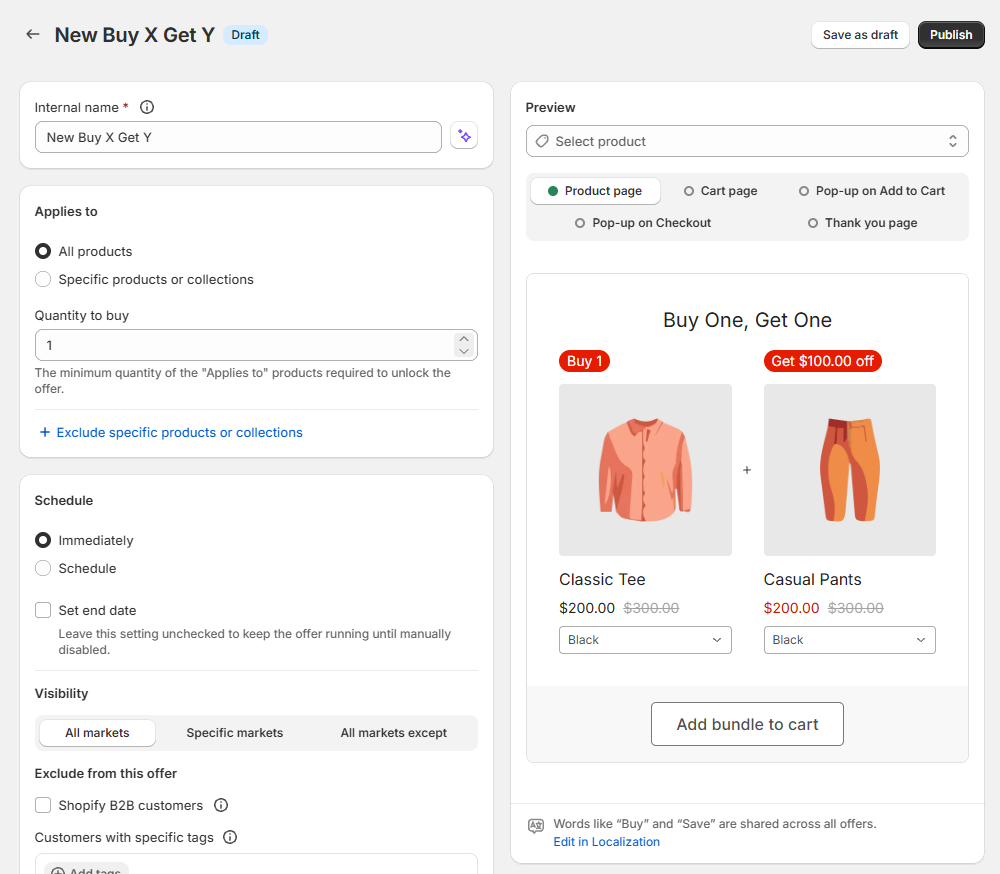
Everything about your offer is set up on a single page. Work down its cards from top to bottom - Internal name, Applies to, Schedule, Discounts, Placements and Add to cart redirect - and watch the Preview beside them update as you go. When you're done, click Save as draft or Publish.
Internal name and Applies to
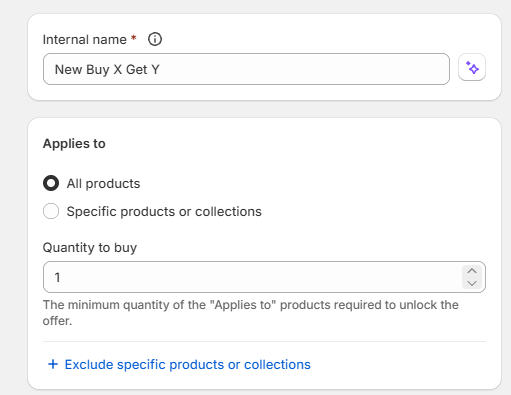
Start by giving the offer an Internal name. Only you see it, and it helps you tell your offers apart.
In the Applies to card, choose the products that unlock the offer - the "X" your shoppers need to buy.
Pick All products, or Specific products or collections and click Browse to select them. If some products inside your selection shouldn't unlock the offer, click Exclude specific products or collections to leave them out.
Then set Quantity to buy - how many of these products a shopper needs to buy to unlock the offer. For a "Buy 2, get 1" offer, enter 2.
Schedule
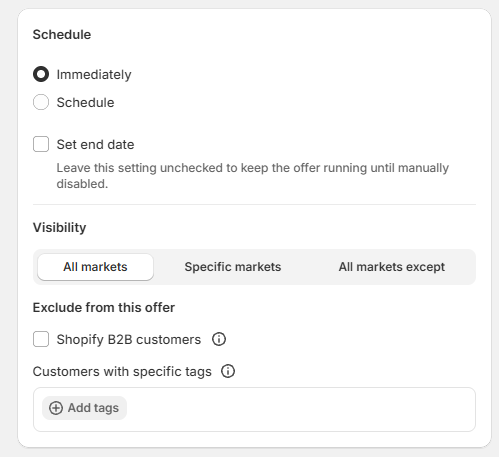
Use the Schedule card to decide when the offer runs. Under Publish offer, choose Immediately, or choose Schedule and set a Timezone, Start date and Start time. To stop the offer automatically, tick Set end date and choose an End date and End time. Leave it unticked to keep the offer running until you turn it off.
If your store sells in several Shopify Markets, a Visibility section in this card lets you show the offer in All markets, Specific markets, or All markets except the ones you pick.
Hiding the offer from certain customers
At the bottom of the card, under Exclude from this offer, you can choose who won't see the offer:
- Shopify B2B customers - hides the offer from customers who are logged in and buying for a company through Shopify B2B, so the promotion stays with your direct-to-consumer shoppers.
- Customers with specific tags - click Add tags and pick or type the customer tags to exclude. Anyone with one of those tags won't see the offer.
Excluded customers don't get the discount at checkout either. Both settings are off by default, and customers are only recognized once they're logged in to their account.
Discounts
The Discounts card sets what shoppers get - the "Y" - and how much they save.
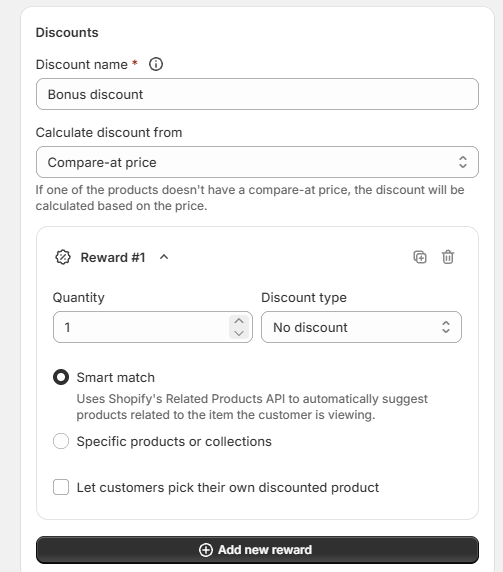
First, enter a Discount name. This is the label your discount shows under in the cart and at checkout.
Calculate discount from decides which price your savings are shown against: Price or Compare-at price (the default for new offers). If one of the products doesn't have a compare-at price, the discount is calculated based on its price. This only changes which price appears crossed out in the offer - the discount your shoppers get stays the same.
Below that, each Reward is something the shopper gets. For every reward, set:
- Quantity - how many items the shopper gets.
- Discount type - No discount, Percentage off, Amount off or Fixed price. For Percentage off and Amount off, enter the Discount per item. For Fixed price, enter the Total price.
- The reward products - keep Smart match, or choose Specific products or collections and click Browse.
- Let customers pick their own discounted product - shows up when a reward has more than one product to choose from (for example, several products or Smart match). Tick it to let shoppers pick which product they get from a menu in the offer. It's unticked for every new reward.
💡 Tip: To give the reward away for free, choose Percentage off and enter 100. To show the offer without any discount, choose No discount.
Click Add new reward to add another reward. A collapsed reward sums itself up in its header (for example, Quantity 1 · Percentage off), and the icons beside it let you duplicate or delete it.
Placements
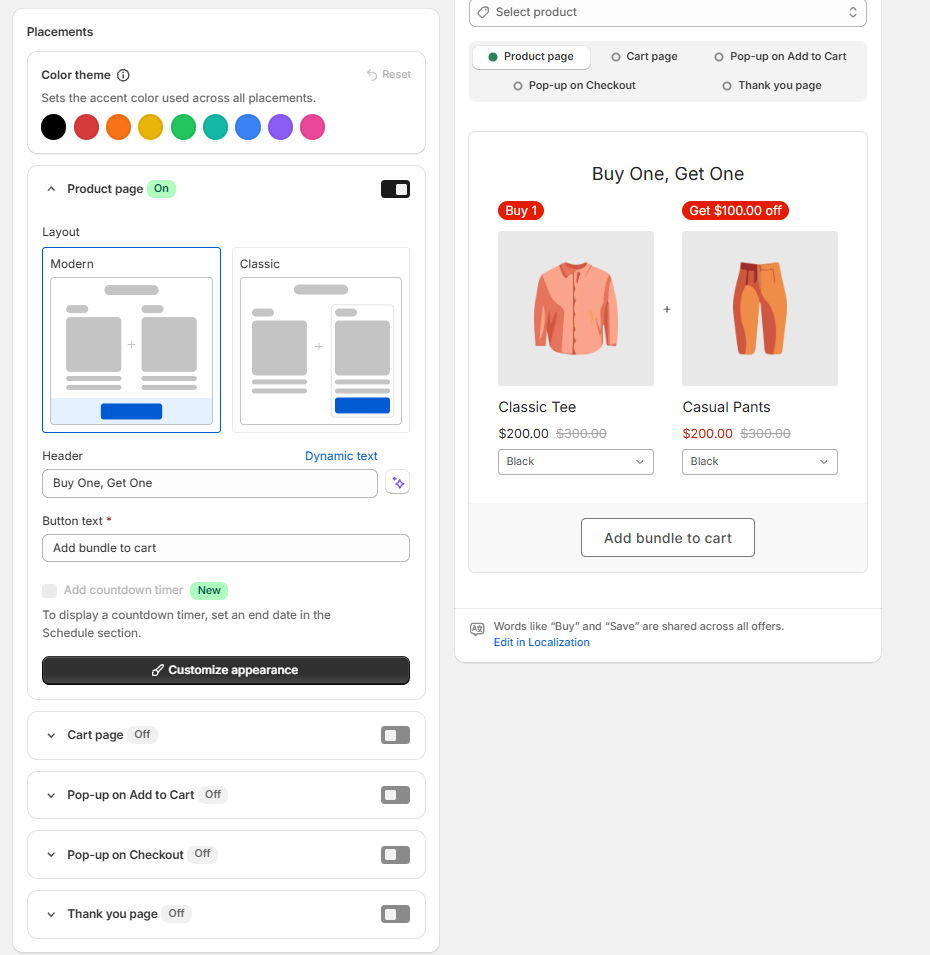
The Placements card controls where the offer appears. The Color theme at the top sets the accent color used across all placements. Below it is a row for each placement: Product page, Cart page, Pop-up on Add to Cart, Pop-up on Checkout and Thank you page. Use a row's On / Off toggle to turn that placement on or off, and expand the row to edit its content. If a placement shows Unavailable, the offer has more rewards than that placement supports - remove rewards to use it.
Product page - shows the offer directly on the product page.
Expand the row to edit the offer's text, such as its Header, Badge text and Button text. Click Customize appearance to change colors, sizing and the offer's position on the page, or to switch its Layout between Modern and Classic.
To add urgency, tick Add countdown timer (below Badge text). The countdown runs to your offer's end date and disappears once it passes, so the checkbox only becomes available after you set an end date in the Schedule card.
Cart page - suggests the offer when shoppers view their cart.
Thank you page - presents the offer after the shopper completes a purchase. To learn more, see Displaying Post-Purchase upsell suggestions on the Thank You page.
Pop-up on Add to Cart - suggests the offer in a pop-up right after a shopper adds one of the offer's products to the cart.
This way, shoppers see the offer even if they add the product with your store's own button instead of the offer's.
Pop-up on Checkout - shows a last-chance offer before checkout completes.
Add to cart redirect
The Add to cart redirect card sets where shoppers go after they add the offer to the cart. It follows your store's default unless you choose a different option for this offer.
Saving and publishing
When you're happy with the offer, click Publish to make it live, or Save as draft to finish it later. A published offer still follows the dates in its Schedule card.
The More actions menu at the top of the offer page lets you Duplicate or Translate the offer, open its Analytics, or Suggest feature.
What shoppers see in the cart
When a shopper adds your offer to the cart, the items they get are grouped under the product they bought instead of showing up as separate items. You'll see this in the Vitals Cart Drawer and in Shopify Checkout, including when the offer is added from the Pop-up on Add to Cart, Cart page or Pop-up on Checkout placements. If a shopper removes the product they bought, the items grouped under it are removed too. There's nothing to set up.
One exception: if the reward is the exact same product variant as the one being bought (for example, buy a size M T-shirt, get a second size M T-shirt free), the reward appears as its own line in the cart.
Your offer on a sold-out product page
If a shopper opens the page of a product that has sold out, your offer still appears there so shoppers can see the deal, but its Add to cart button can't be used while a sold-out item is selected. If the product has other variants in stock, choosing one of those makes the button work again. Products pulled in as rewards from a collection or by Smart match are only offered while they're in stock.
An offer is still hidden completely if a product in it has been deleted or isn't published to your Online Store sales channel.