
How to create Shipping Rules in Shopify
Last updated on October 31, 2026
The Shipping Information app imports each rate's name, price and order-value limits from your Shopify shipping settings. Delivery estimates are set separately in Vitals. You need to follow these steps to set your shipping rules:
You need to go to the Settings area, click shipping, and then click on the Manage rates button.
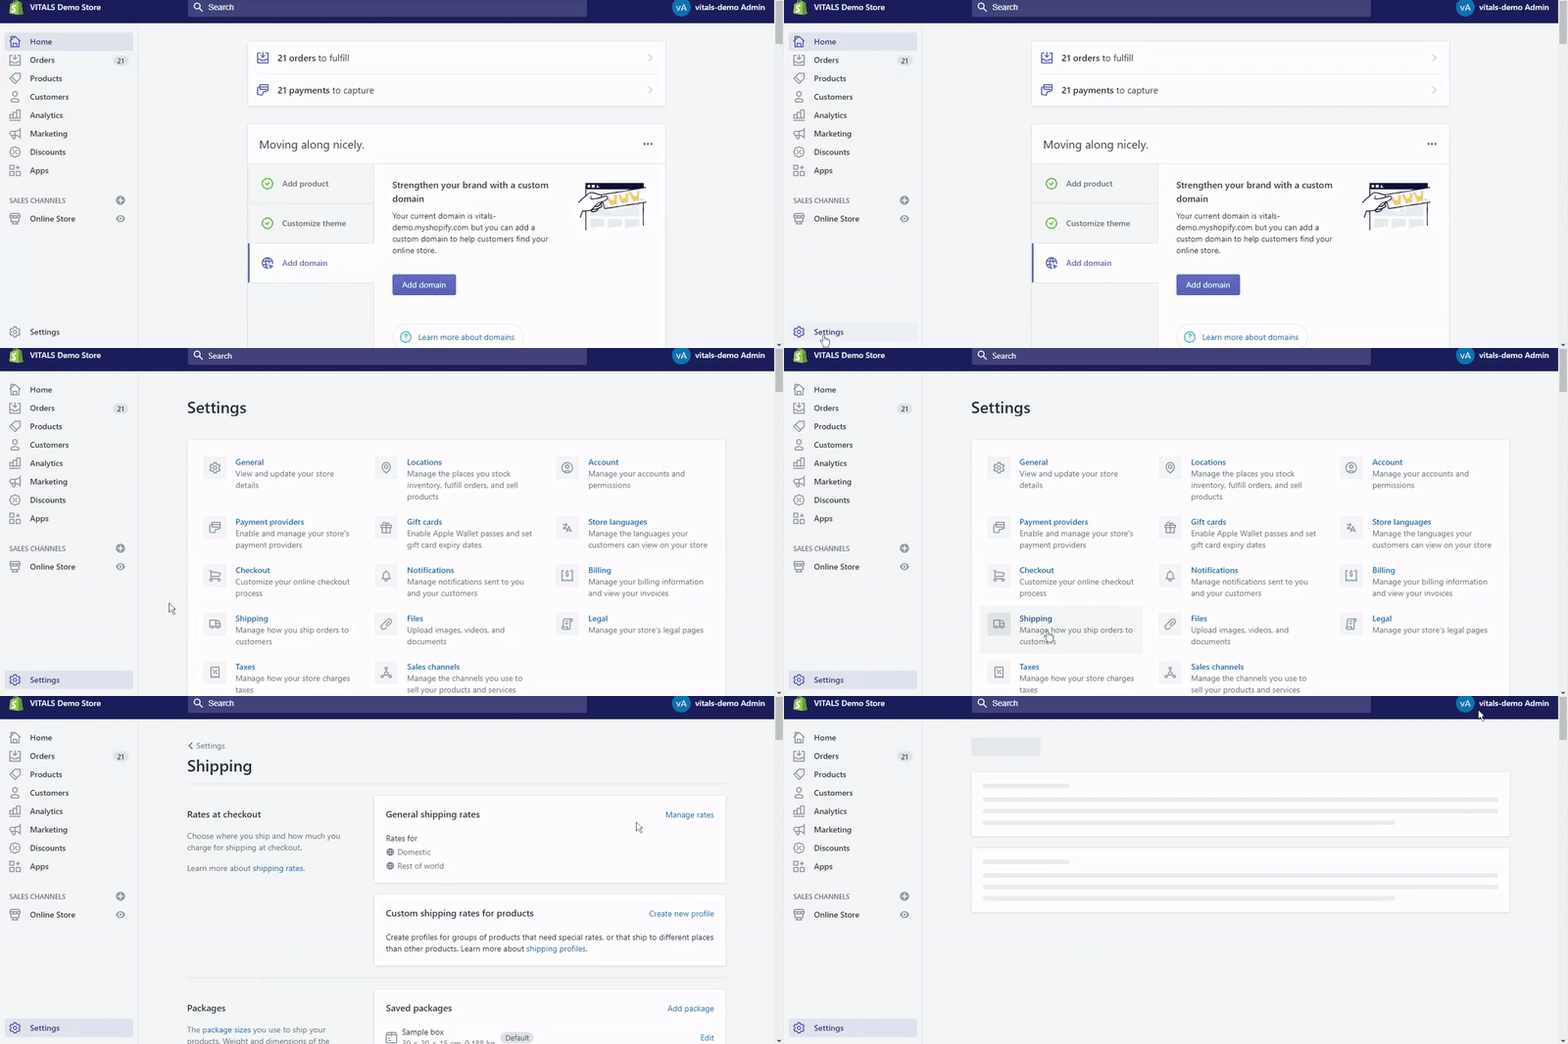
Then you will need to edit an existing shipping zone or create a new one.
After that, you can add a shipping rule (rate) for that zone, either free or paid.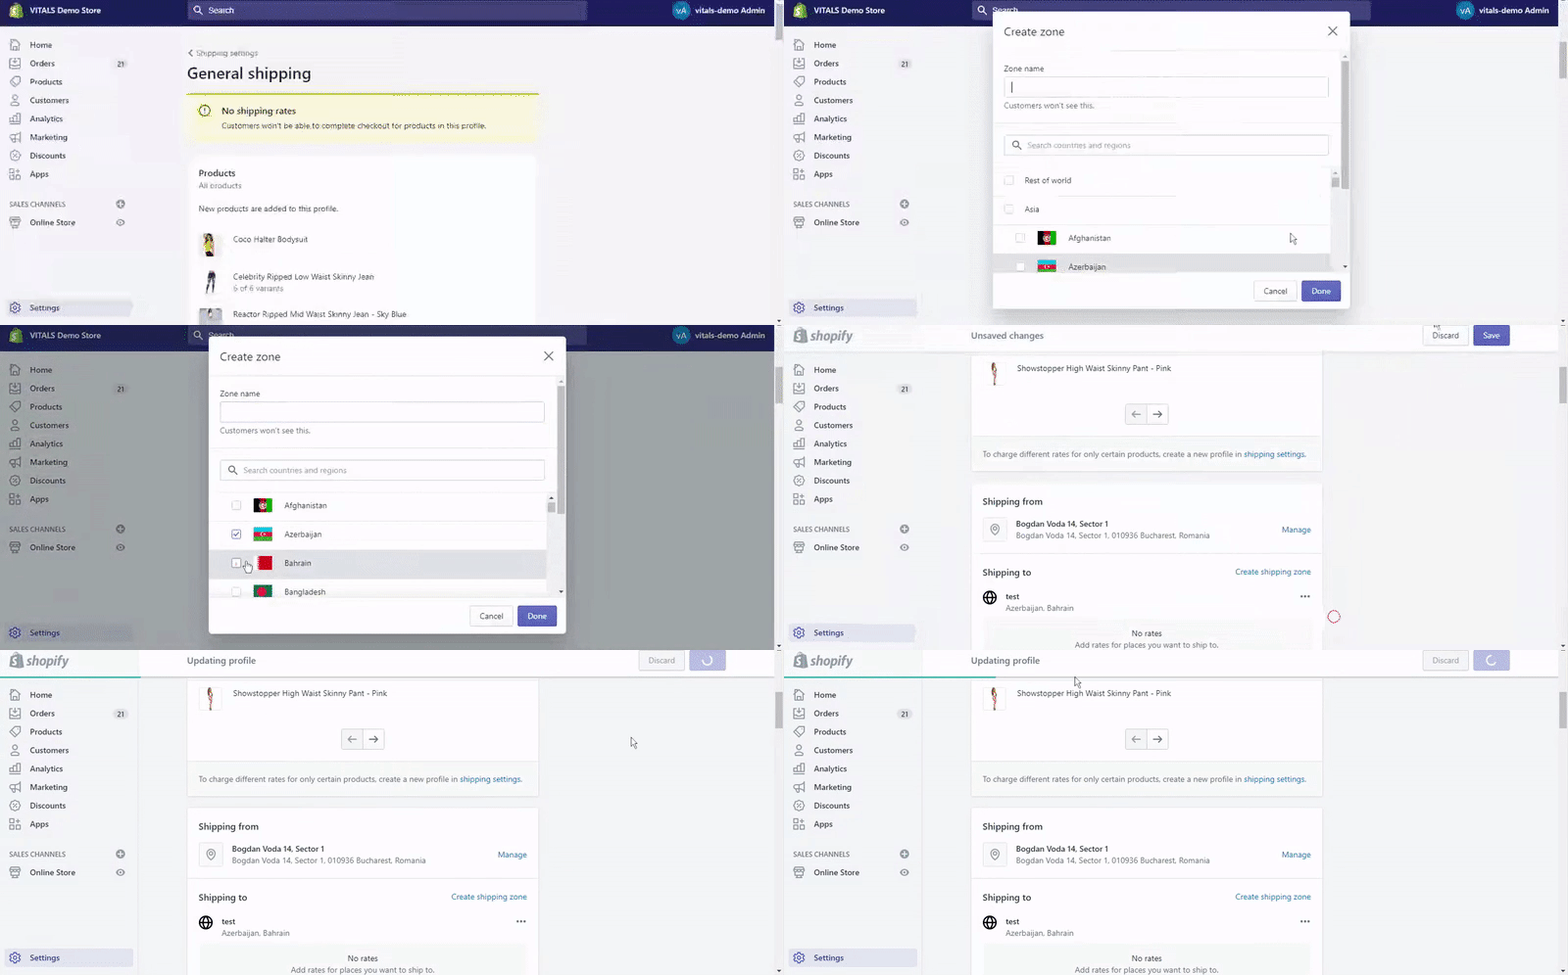
Once you're done setting your shipping rules in Shopify, return to the Shipping Information app's settings page (in Dynamic Shipping Rates mode) and click the Sync now button to update the shipping table. Then open each shipping profile marked Profile has missing info! and add its minimum and maximum delivery time. Visitors from those locations won't see delivery estimates on the product page until you do.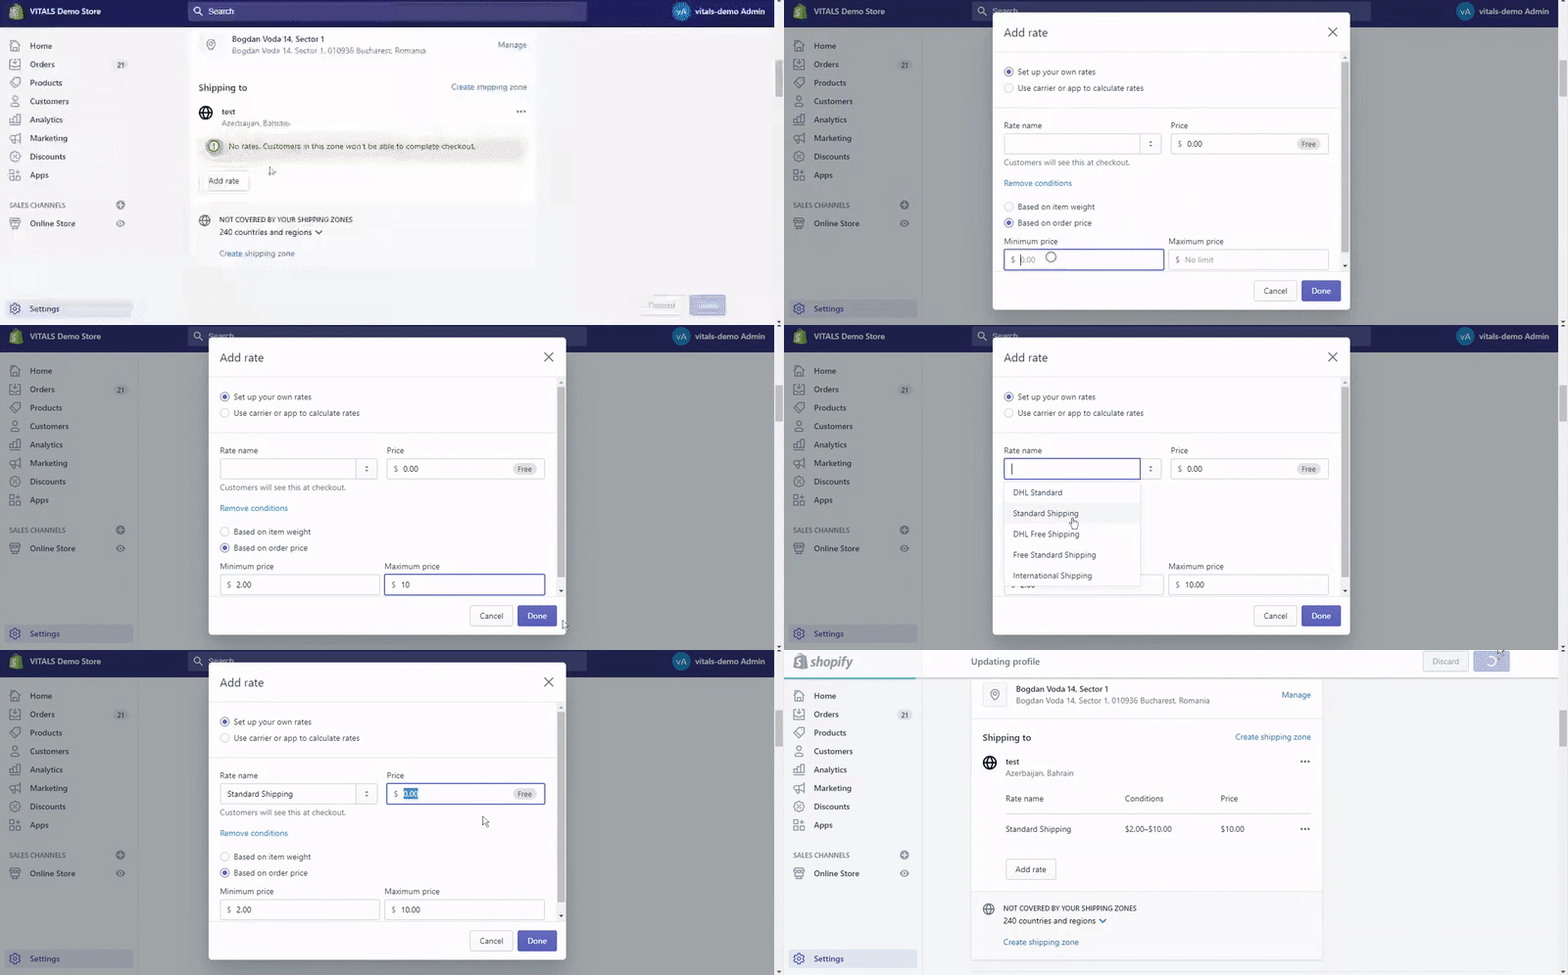
To hide the Shipping Information widget for certain countries in Dynamic Shipping Rates mode, go to the app's Shipping profiles card, open each zone that covers those countries (including a Rest of world zone, if applicable) and set each rate's Status to Inactive. Visitors in those countries will not see the widget, but your Shopify checkout shipping options will not change. Inactive rates remain inactive after you click Sync now; review any new zones you add in Shopify later.
Please keep in mind that the app imports flat rates and rates based on order price. Weight-based and carrier-calculated rates are not synced or displayed.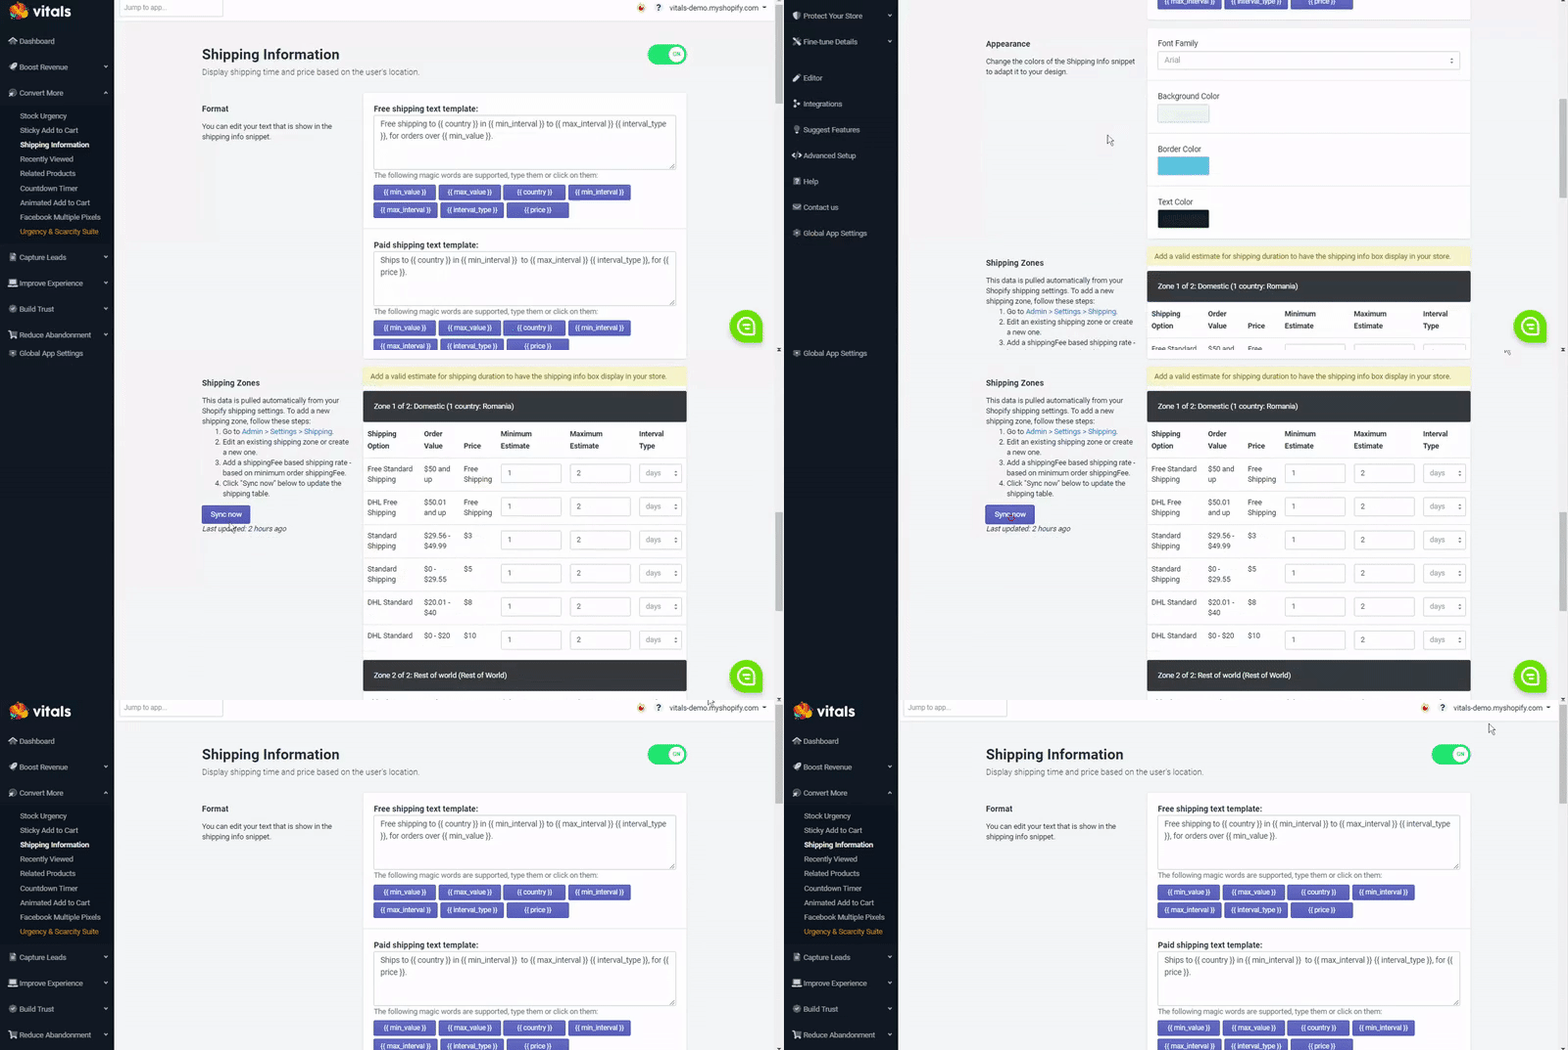
Still stuck?
Chat with our support team, we'll sort it out with you.